Phone:
(701)814-6992
Physical address:
6296 Donnelly Plaza
Ratkeville, Bahamas.

Phone:
(701)814-6992
Physical address:
6296 Donnelly Plaza
Ratkeville, Bahamas.
With sewing, it’s not just a matter of sewing pieces of fabric together. It’s a matter of having a system, a road map, of how to get from point A to point B. Systematically approaching your sewing projects helps eliminate errors, increases your chances of achieving your goals and makes even the most daunting project seem easy. Many times when I hear that people are having a difficult time with sewing it’s because they are taking steps out of order or missing steps altogether.
A repetitive sewing process provides guidance. This will allow you to plan, perform, inspect, and adjust each step to ensure your completed project finishes nicely, is the correct size, and lasts.
Understand the pattern
I have found that the first step in every project is to read and understand the pattern. If you don’t, you will be confused later on.
Read All the Instructions
Look over all of the instructions before starting the pattern. The front page will tell you what notions you need, the seam allowance, recommended fabric, and if there are any special skills you will need. Check to see if there are any special symbols and lines that the pattern designer has included for help with placement and construction.
Compare your measurements or the measurements of a finished garment that fits you well with the measurements on the pattern’s size chart. Don’t use the size on your off-the-rack garments to decide your pattern size.
Familiarize yourself with your pattern pieces. Check for grain line, fold line, notches, dart, and placement lines. Knowing what these are will help you from going wrong when putting your pieces together.
Fabric and Material Choices (Second Step)
The choice of material impacts the building process and the result.
Match Fabric to Pattern Use the recommended fabric types whenever possible, especially as a beginner. Patterns are designed around specific fabric behavior such as drape, stretch, or structure.
Gather Notions. Notions include thread, zippers, buttons, elastic, interfacing, etc. Gather these items as indicated on the pattern and have them ready so you don’t have to stop in the middle of your project to search for them.
Prewash and Prepare
Wash and dry fabric as you will the completed garment to avoid shrinkage or skewing. Iron fabric before cutting.
Layout and Cut
You can’t have accurate sewing without accurate cutting.
Align with Grain
Grain line arrows indicate the pattern piece should be aligned to the grain. Alignment of the grain line is necessary to ensure the garment hangs and stretches properly. A piece not aligned to the grain can twist after sewing.
Pin or Weigh Pattern Pieces
Pin or use pattern weights to keep the pattern pieces from moving as you cut. Make sure the fabric is flat and even on the table.
Accurately Cut Cut with sharp scissors or rotary cutter. Cut on the line, not outside of the line, nor inside the line. When cutting curves, cut slowly to preserve the accuracy of the shape.
Transfer Markings
With chalk or a marker mark the dart, notch, fold line and mark locations. All of these will come in handy during construction.
Cutting pieces prior to assembly.
Some steps before sewing help it to be more efficient and precise.
Interface as necessary
Follow the recommended application instructions to apply interfacing to the pieces that require it. Interfacing is used to give stability to the collar, waistband, and placket. Make sure to test the interfacing on a scrap of fabric before applying it to ensure that your iron settings are correct.
Raw Edges Where Necessary
Several patterns will tell you to finish the raw edges as you go. This will keep things from fraying, and make it easier later.
Organize Pieces: Organize the cut pieces in each section, and label them if you want. It will make things clear and you won’t sew wrong pieces together.
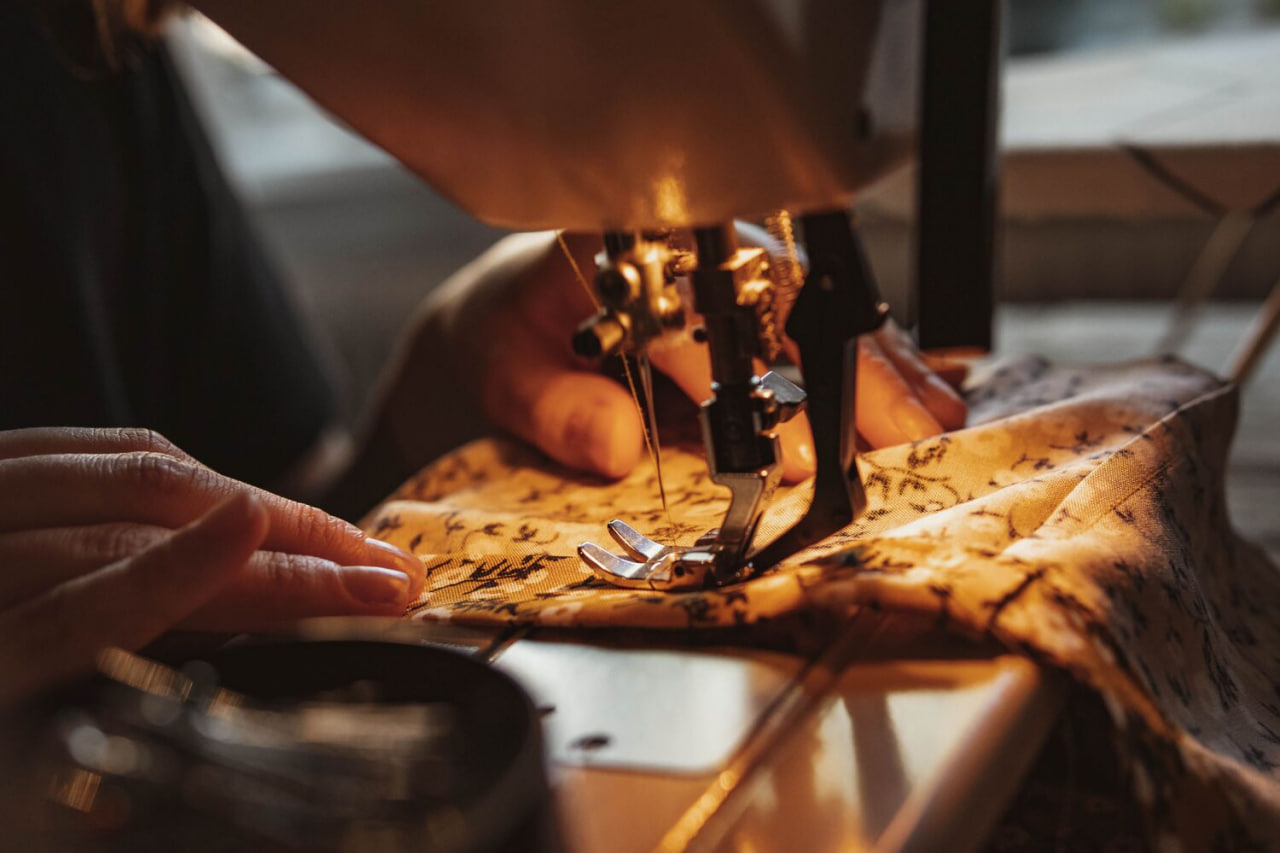
Check the Stitching and Set Up the Machine
Your machine should be checked before sewing on any parts of the project.
Checking the Thread and Needle Put the right needle on the sewing machine for the type of fabric you are sewing and then make sure to thread the machine correctly. Evenly wind the bobbins.
Test on Scrap Fabric
Do test stitches on the scrap fabric of the project. Adjust the stitch length and thread tension as needed to achieve balanced and smooth stitches. You don’t want to ruin your pieces.
Assembly Step-by-Step.
For construction, always use the order of the pattern unless you know the other ways.
Following the Instruction Sequence
Instructions are written in a specific order of construction. Constructing parts out of order can make it hard or even impossible to complete at a later stage.
Match Notches and Markings
Make sure notches, dots, and seam lines match as you sew. They help you shape and match the garment accurately.
Secure and Pin
Pin pieces to each other when sewing. Remove pins as you get close to them, never sew over a pin.
Seam Allowance
Always use the proper seam allowance. You can use the guides on your sewing machine to help you keep the same seam allowance.
Pressing While You Build
Pressing is a component of sewing. It is not a conclusion.
Press After Each Seam
Press seams flat to set the stitches, then press open or to one side as the pattern directs. This will help eliminate bulk and improve the fit as you go on.
APPLY THE RIGHT AMOUNT OF HEAT. Select the correct temperature based on the type of fabric you are using. If you’re using anything delicate, use a pressing cloth.
Shape with Pressing Tools Use a tailor’s ham or seam roll for curved areas so you do not flatten shaping details.
Fitting and Adjustments
If you don’t have fit checks you’ll be disappointed in the end.
Always test fit garments at key points. For example, have the wearer test fit a dress at the bodice or waistband point. It is much easier to make changes at this point than it will be once the garment is completed.
Make Incremental Changes
Adjust seams gradually rather than making large changes at once. Re-test fit after each adjustment.
9th Step – Finishing Techniques
Finishing operations add strength and give a professional appearance.
Edge Finishing
Finish seam allowances with zigzagging, overlocking or binding to prevent fraying.
Hems. Measure and press hems prior to sewing. Use guides or hem gauges for uniformity.
Closures and Details: Add buttons, zippers, hooks, and elastic, and use additional stitches to reinforce stress points.
Final Check and Maintenance
The last step is a review to confirm the quality.
Trim Threads. Remove any loose threads and make sure you didn’t miss any seams on the inside.
Final Press
Final press all areas to maintain shape and flatten seams.
Care Notes
Take note of how it needs to be washed and cared for depending on the fabric you choose. You want it to keep well once it’s done.